

DIY Cabinet Installation
In recent years, more and more people have been encouraged to install cabinets on their own, especially those homeowners who want to improve both the aesthetics and functionality of their homes. This growing interest can be explained by several reasons, such as easier access to resources, the rise of home improvement skills among the public, and of course, the desire to have more personalized spaces.
One of the main advantages of tackling this type of project on your own is the considerable savings that can be achieved. Hiring professionals in the sector often entails a significant expense in labor, which can considerably increase the budget, even in simple renovations. By opting for the «do-it-yourself» approach, homeowners can reduce these costs, and those savings can be reinvested in better quality materials or even in future projects. In addition, many home improvement stores offer comprehensive resources such as video tutorials, workshops, and expert advice, making it easier for people to acquire the skills necessary to successfully complete their cabinet installations.
But beyond the savings, DIY cabinet installation offers a unique sense of personal satisfaction. Transforming a space through one’s own efforts brings a great sense of pride and happiness. Plus, the flexibility of this type of project allows homeowners to choose styles, finishes, and configurations that fit their vision exactly, creating a truly personalized environment. This level of customization is often lost when relying solely on professional services.
In this comprehensive do-it-yourself guide, our goal is to provide homeowners with the information and confidence needed to embark on their own cabinet installation project. From planning and measuring to final installation, this resource will serve as an invaluable aid to those looking to create a space that is both functional and visually appealing in their homes.
Benefits of DIY Cabinet Installation
Do-it-yourself closet installation can offer many advantages to homeowners looking to improve their homes. One of the biggest benefits is saving money. By doing it themselves, homeowners can avoid labor costs, which often inflate a renovation budget. This financial relief allows resources to be allocated to other major home improvements or decorative elements, maximizing the return on investment.
Beyond the economics, however, the satisfaction of completing a home improvement project on your own is a key reason to consider DIY closet installation. Homeowners take pride in transforming their spaces with their own effort and creativity. This type of satisfaction strengthens a special connection to the home, something that may not be achieved by hiring outside help. Additionally, by completing these projects, homeowners may be motivated to embark on other DIY projects, which improves their overall homeownership experience.
Another advantage of DIY closet installation is the flexibility in customization. Homeowners have the opportunity to design cabinets according to their personal needs and tastes, ensuring that the final design fits perfectly with their spaces. This customization ranges from the choice of materials and colors to styles, allowing for an aesthetic that reflects individual taste. This isn’t always possible with prefabricated cabinets or when working with outside contractors, who often have limited options.
Additionally, participating in DIY projects empowers homeowners by giving them new skills and knowledge. Learning how to install cabinets fosters self-reliance and builds confidence in their abilities, creating a sense of accomplishment that goes beyond the project itself. As they gain experience, homeowners feel more prepared to tackle future projects at home, which not only improves their skills but can also increase the value of their property.
Essential Tools and Materials Needed
If you’re thinking of installing your own cabinets, having the right tools and materials is essential to achieving a successful outcome. Having everything ready not only makes the process easier, but it also saves you time and effort. Here’s a list of essential items and some recommendations for getting them efficiently.
Tools needed:
High-quality drill: Essential for accurately drilling holes for screws and anchors, ensuring a secure fit. Pair with a drill bit set suitable for wood and metal, adapting to different materials.
Level: Ensures that cabinets are mounted straight and properly aligned, avoiding unwanted tilts.
Tape measure: Essential for accurately measuring and determining the precise placement of cabinets.
Materials needed:
Screws and anchors: Vital for fixing cabinets to walls. It’s recommended to choose stainless steel or heavy-duty screws to ensure durability. Depending on the weight of the cabinets, you may also need wall anchors to provide additional support. Consider the type of cabinets you plan to install (whether wall-mounted, base-mounted, or a combination of the two), as this will influence the type of mounting hardware needed.
Where to Buy:
You can get these tools and materials at local hardware stores, home improvement centers, or online retailers like Amazon. Many consumers prefer to shop online for the convenience and ability to compare prices. Regardless of the source, it’s crucial to invest in quality tools; using superior materials significantly improves the overall installation experience and outcome.
Proper preparation, along with the right tools and materials, lays a solid foundation for a successful cabinet installation project. Best of luck with your project!
Preparing for Cabinet Installation
If you’re thinking about installing your own cabinets, it’s essential to follow a few steps beforehand to ensure everything goes smoothly. Let’s look at how you can prepare for this project.
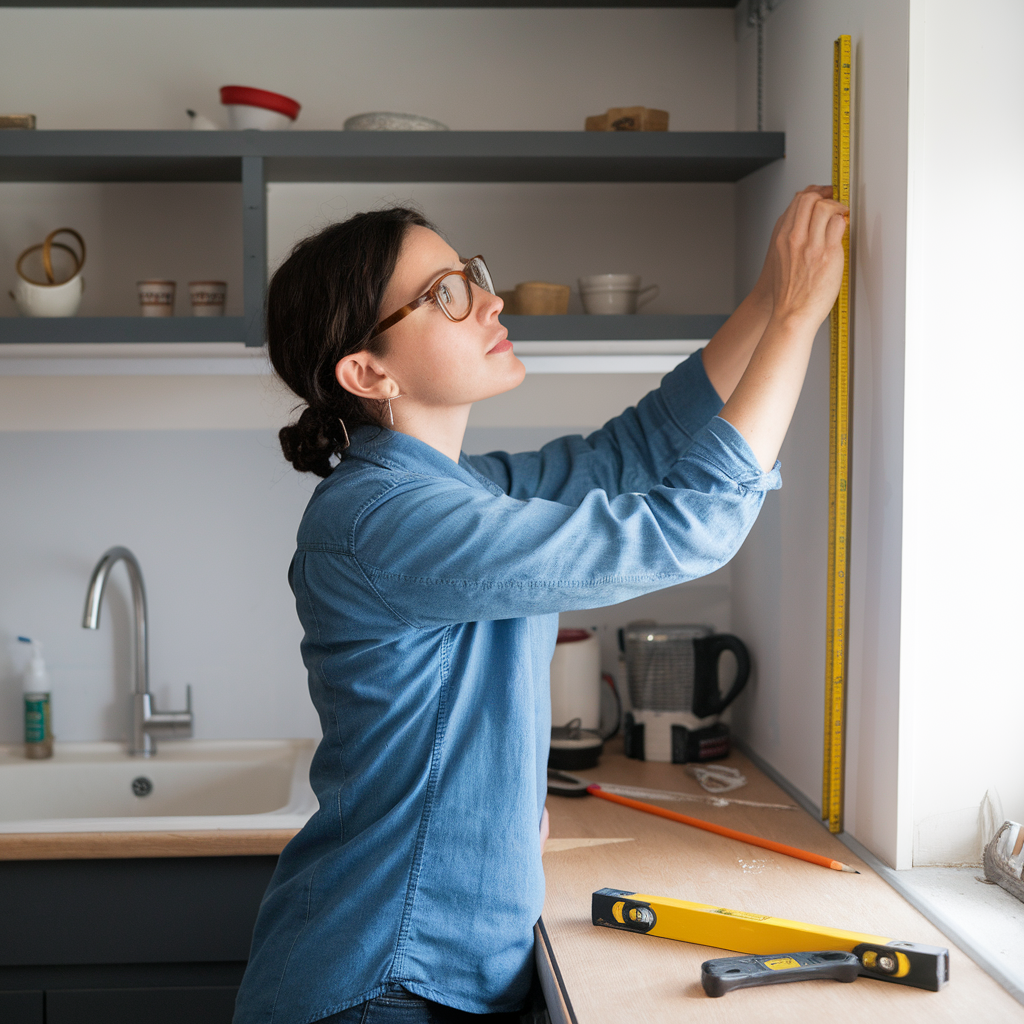
- Take accurate measurements of the space:
First, measure the exact area where you plan to place the cabinets. This includes the width, height, and depth of the space. Don’t forget to take into account elements such as windows, doors, or outlets that may influence the layout. These measurements will help you choose cabinets that fit perfectly and optimize the functionality of the space.

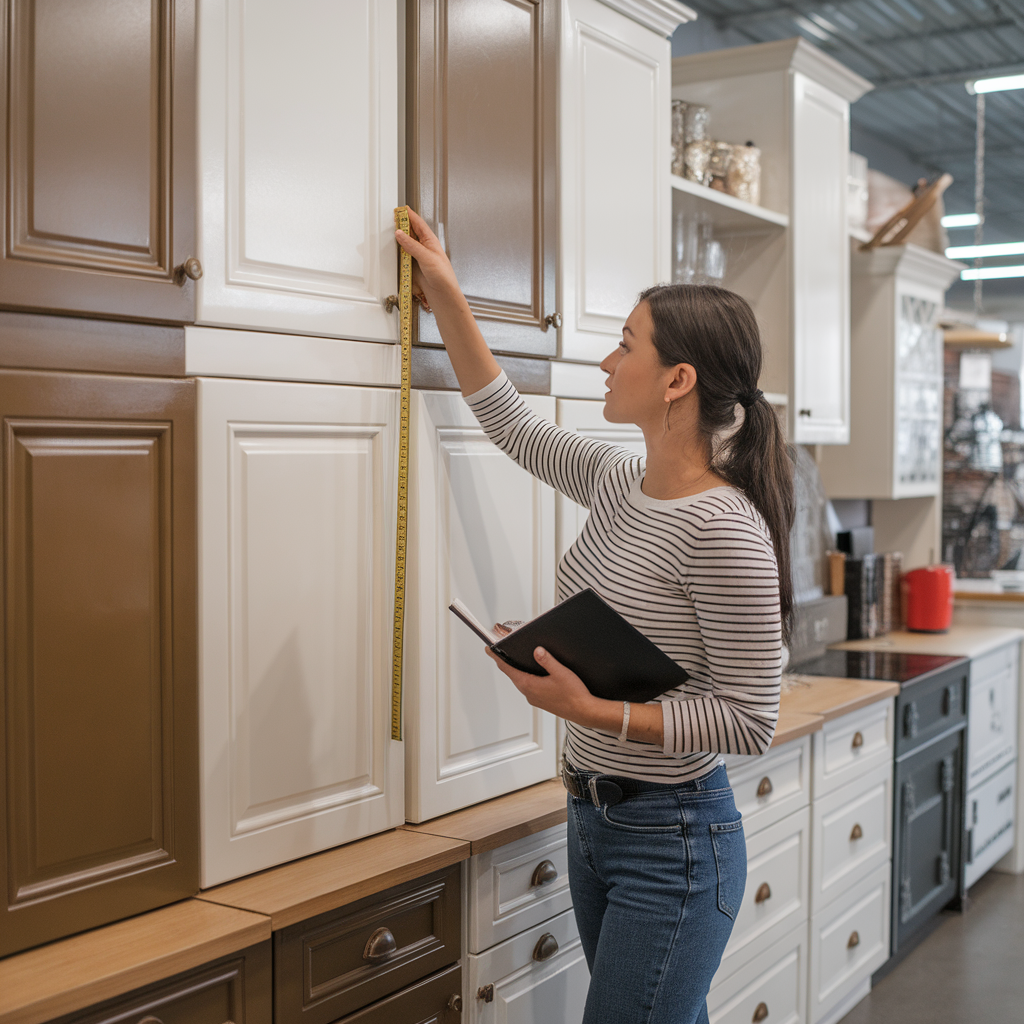
- Select the right style and size:
Think about the style you like best and that matches the design of the room. There are traditional, modern, or contemporary options, and each one adds a different touch. Also, consider your storage needs and the layout of the space to decide if you need base cabinets, wall cabinets, or special units. A careful choice will allow you to have an organized and visually appealing space.
- Prepare the installation area:
Before you begin, clear the area of furniture or objects that could get in the way. Make sure there is enough room to move materials and tools comfortably. Good lighting is essential to see clearly and work safely. By focusing on these details, you will reduce the chance of making mistakes and facilitate a more efficient installation.

Marking and Planning the Layout
It’s essential to properly plan and mark out your space to ensure a successful installation. Let’s see how you can do it step by step.
- Take accurate measurements:
Before you begin, accurately measure the area where you plan to place the cabinets. This includes the width, height, and depth of the space. Don’t forget to take into account elements such as windows, doors, or outlets that may influence the layout. These measurements will help you choose cabinets that fit perfectly and optimize the functionality of the space.
- Draw reference lines:
Use a level to draw horizontal lines on the wall to serve as a guide. Start by determining the desired height for the upper cabinets, usually around 54 inches from the floor, and draw a horizontal line along the wall. This line will serve as a guide for the bottom edge of the cabinets.
- Plan the layout:
Before installing, it’s a good idea to draw a floor plan of the space, indicating where each cabinet will be placed. Pay particular attention to the placement of corner cabinets, which may require special consideration to maximize storage and accessibility. Make sure there are adequate spaces for appliances and passageways, making movement within the kitchen or bathroom easier.
- Consider aesthetics:
In addition to functionality, don’t forget the visual aspect. Harmonizing cabinet styles and colors will create a unified look that enhances the overall appeal of the room.
By following these steps, you’ll be able to properly plan and mark out the space for your cabinet installation, ensuring a successful result that combines practicality and design.
Step-by-Step Installation Process
You’re about to embark on a project that can transform both the functionality and appearance of your space. We’re going to break down the process into two main stages: first, installing the lower cabinets, and then, installing the upper cabinets. Following an orderly procedure will help you achieve a successful outcome.
- Installing the lower cabinets:
Preparation: Before you begin, make sure you have the necessary tools on hand: a level, a drill, screws, and a stud finder. These tools will be essential for an accurate installation.
Marking: Use the level to draw a horizontal line on the wall indicating the height at which the lower cabinets will be installed. This line will serve as a guide to properly align the cabinets.
Locating the studs: Using the stud finder, locate the studs on the wall where you will attach the cabinets. This will ensure a secure and stable hold.
Temporary support: Place a support board under the marked line to hold the cabinets while you install them. This will make the process easier and allow you to work more comfortably.
Installation: Place the first cabinet in position, using shims to ensure it is level and aligned. Once in place, screw the cabinet to the wall studs to secure it firmly. Repeat this process with the remaining cabinets, making sure each one is aligned with the last for a uniform look.
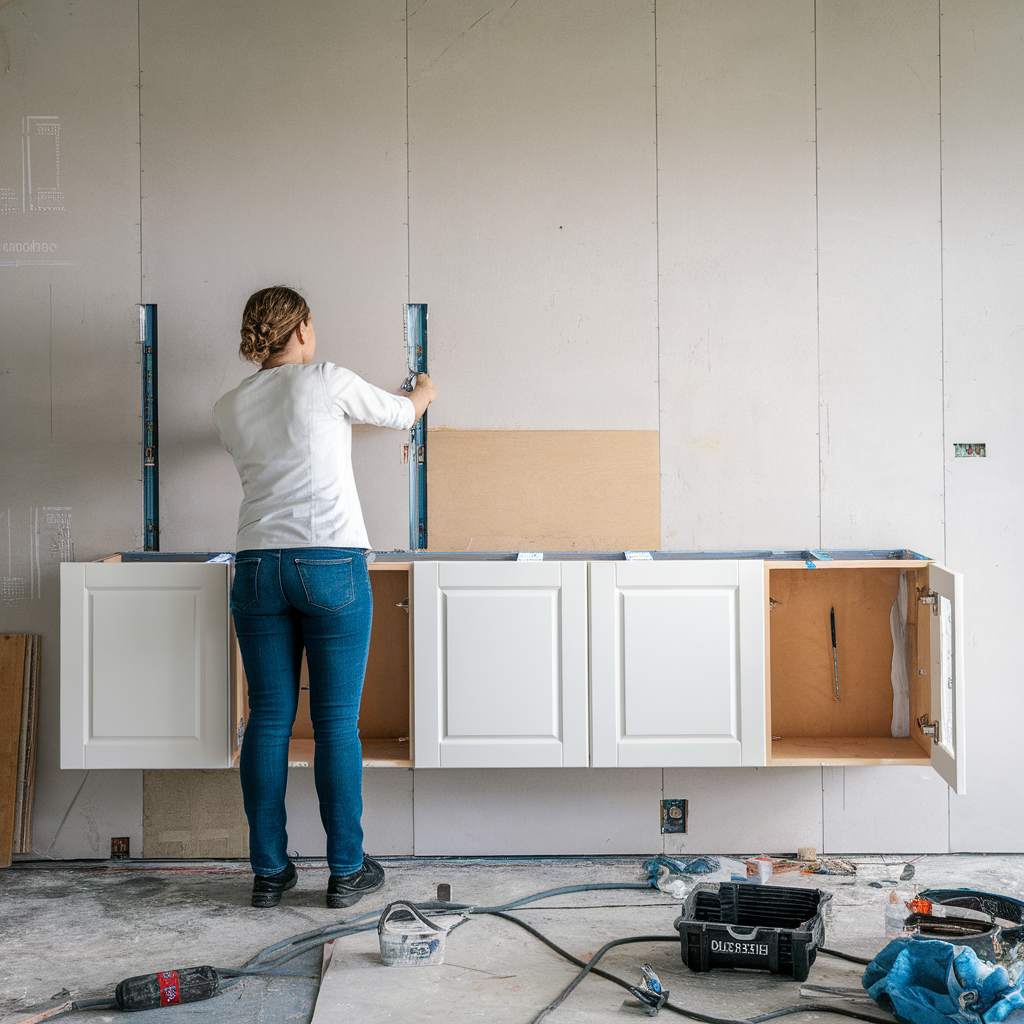
- Installing the Upper Cabinets:
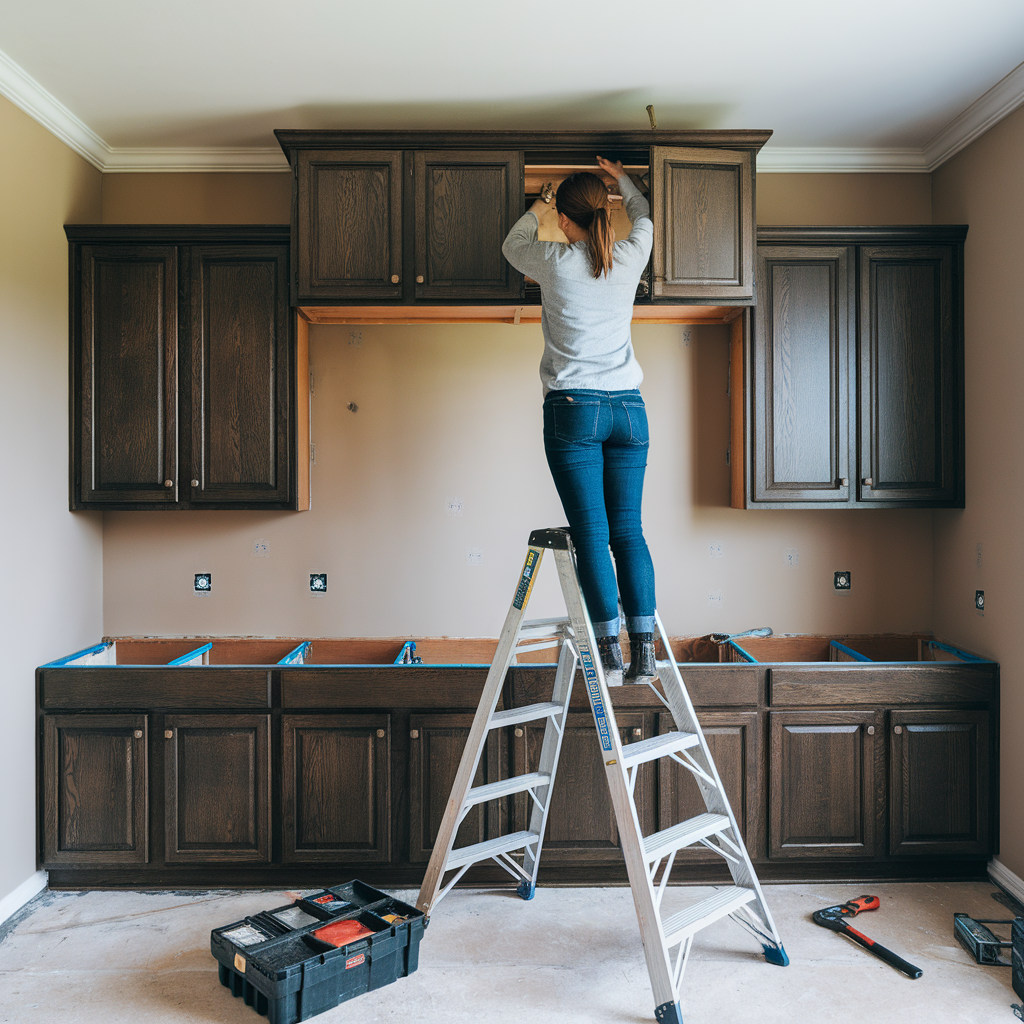
Marking: Determine the height at which the upper cabinets will be installed and draw a horizontal line on the wall indicating the base of these cabinets. This line will help you maintain accurate alignment.
Temporary Support: As with the lower cabinets, place a support board under the marked line to support the upper cabinets during installation.
Installation: Start with the corner cabinet, if applicable, and attach it to the wall studs, making sure it is level. Continue with the remaining cabinets, connecting them together with screws and maintaining precise alignment for a uniform installation.
Final adjustments: If you encounter obstacles such as electrical outlets or corner gaps, carefully measure and make any necessary cuts in the cabinets to accommodate these irregularities. This will ensure that each cabinet fits perfectly into place.
By following these detailed steps, you will be able to install your cabinets effectively, combining functionality and design to create a space that suits your personal needs and tastes.
Working with an Assistant for Success
Enlisting the help of an assistant can be a great idea. Not only does it make handling heavy and bulky cabinets easier, but it also reduces the risk of injury. With a partner, they can lift and place the cabinets more efficiently, making the process much smoother.
Additionally, having someone to help you hold the cabinets steady while you secure them to the wall or other surfaces is critical. This allows for greater accuracy, ensuring the cabinets are aligned properly, which is essential for both aesthetics and functionality. With an assistant overseeing level and alignment, costly mistakes and the need for adjustments later are minimized.

Effective communication is key to making the most of teamwork during cabinet installation. Before you begin, it’s a good idea to discuss everyone’s roles and responsibilities. Clearly defining tasks helps both of you understand your contributions. For example, one person can focus on measuring and marking, while the other holds the cabinet in place or handles the drill. Using clear, simple instructions throughout the process, especially when adjustments or realignments are needed, fosters a collaborative and efficient work environment.
In short, having the help of a cabinet installation assistant not only eases the physical burden, but also improves accuracy and communication, leading to a successful outcome.
Practical Tips for a Smooth Installation
Installing your own cabinets at home is a great idea! Not only will you improve the functionality and look of your space, but you’ll also enjoy the process. Here are some practical tips to make everything go smoothly:
- Keep your work area tidy
A clean and organized environment is not only safer, but it also allows you to easily find the tools and materials you need. Clear away debris and organize components regularly for a more efficient workflow.
- Double-check measurements
Before you begin, make sure to accurately measure both the wall space and the cabinets. This will prevent costly mistakes and save you time. Use a reliable tape measure and, if possible, mark the layout on the wall with a pencil to visualize the final result.
- Be patient and address problems meticulously
It’s normal for snags to arise during installation. If the cabinets don’t line up properly, assess the leveling and adjust as needed. Use shims to correct small discrepancies, and don’t forget to take periodic breaks to avoid fatigue.
- Align cabinets carefully
Take time to check the position of each cabinet to achieve a professional finish. As you go, step back and assess the job from different angles to make sure everything is in place.
- Consider the help of an assistant
Having someone to support you can make the process much easier. An assistant can help you handle heavy cabinets, hold them steady while you secure them, and ensure they’re aligned properly. Plus, effective communication between the two of you is key to successful teamwork.
Remember, cabinet installation is a project that requires time and dedication, but with these tips, you’re sure to achieve a spectacular result!
Finishing Touches and Final Steps
Now that we have our cabinets safely installed, it’s time to focus on the final details that will complete the process. First, let’s install the cabinet doors. It’s critical to ensure that the hinges are properly aligned for smooth operation; this may require minor adjustments. Follow the manufacturer’s instructions for the specific type of hinge you’re using, thus ensuring a secure fit. Check each door to ensure it opens and closes without obstruction, which not only improves functionality, but also aesthetic appearance.
Once the doors are mounted, the next step is to attach the handles and knobs. This is an excellent opportunity to go over the overall design. Choose hardware that complements the style of your cabinets, whether modern, traditional, or rustic. When installing the handles, make sure they’re placed at a uniform height on each door for a polished look. Tools like a tape measure and level can help achieve accuracy in placement, which is essential for a professional finish.
If adjustments to cabinet levels or alignment are necessary, take the time to carefully fine-tune them. Make sure all cabinets are level and securely mounted to avoid potential problems down the road. Even minor misalignments can affect the functionality of cabinets, so it’s critical to fix them before you consider the installation complete.
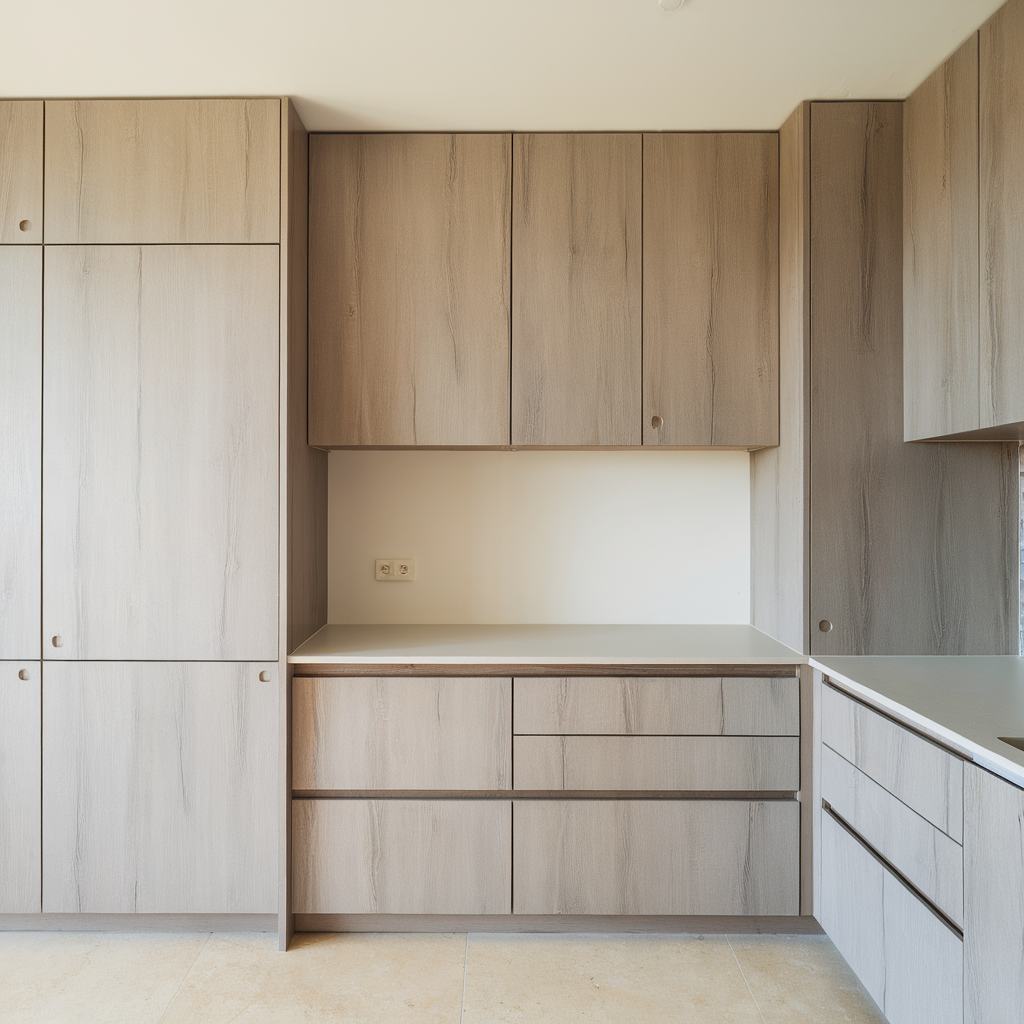
To further personalize your new cabinets, consider applying paint or stain that complements your existing decor. This final step can significantly enhance the overall look of your kitchen or bathroom. Whether you opt for a bold color or a classic wood stain, finishing can transform standard cabinets into statement pieces in your home. Ultimately, these finishing touches culminate in a cohesive and functionally beautiful space.
If you want to extend your home renovation projects further and transform your space and you are not experienced in decorating and renovating, we recommend that you read this guide to decorating and transforming spaces. To purchase it, just click here.